OEE WebStudio Compilation
Now that the OEE Monitor has been configured, WebStudio can be used to access tables related to OEE monitoring. To do this, firstly, launch WebStudio and create a new compilation. Click the plus icon in the menu bar to open the Widget Model Editor.
| If you are not interested in the configuration of the widgets but you want an out-of-the-box OEE WebStudio compilation, see the Ready-to-Go Example for OEE Dashboards. |
Production Runs Table
In the Widget Model Editor, select 'Time Period Table' from the left-hand panel to open an example configuration. All of the data needed to construct the Production Runs table will be retrieved from the system so the table property is not required and can be removed from the model.
-
It is recommended to change the
nameto "Production Runs" and provide adescriptionif required in order to provide clarity on the type of information displayed in the table. -
Add a
dataSourceproperty to the model withtype"tpm-oee" andsubject"big-table_production-runs". Using the configured OEE Demo system, thepathshould be "/The OEE Demo Enterprise/The OEE Demo Site/The OEE Demo Area/The OEE Demo Cell/OEE/Production/Production Runs".When configuring the model for your own system, the pathshould point to the Production Runs object associated with the TPM OEE Equipment Monitor object, found in the ISA-95 Equipment Model in DataStudio.
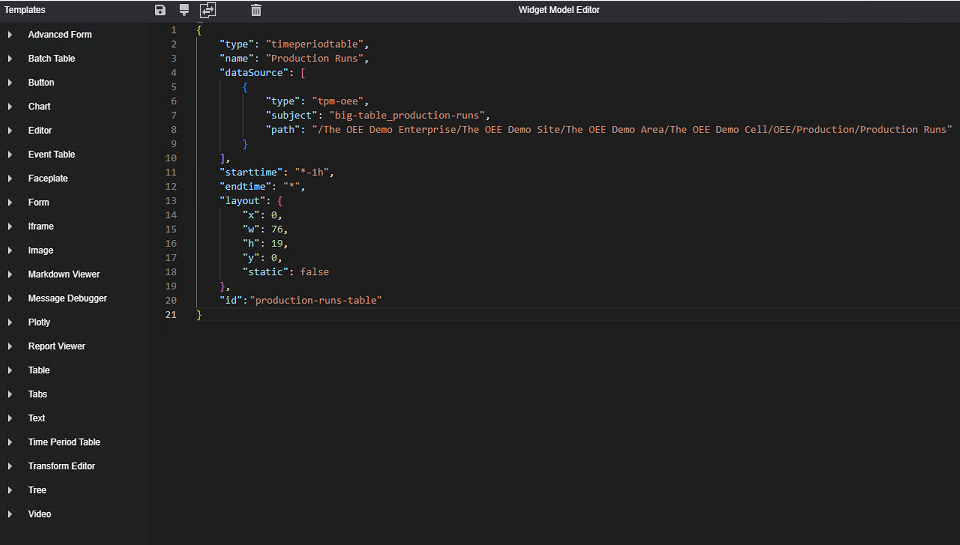
Alternatively, copy the model below into the Widget Model Editor.
{
    "type": "timeperiodtable",
    "name": "Production Runs",
    "dataSource": [
        {
            "type": "tpm-oee",
            "subject": "big-table_production-runs",
            "path": "/The OEE Demo Enterprise/The OEE Demo Site/The OEE Demo Area/The OEE Demo Cell/OEE/Production/Production Runs"
        }
    ],
    "starttime": "*-1h",
    "endtime": "*",
    "layout": {
        "x": 0,
        "y": 0,
        "w": 85,
        "h": 31,
        "static": false
    },
    "id": "production-runs-table"
}
Click the save icon at the top of the Widget Model Editor to create the Production Runs table in the WebStudio compilation.
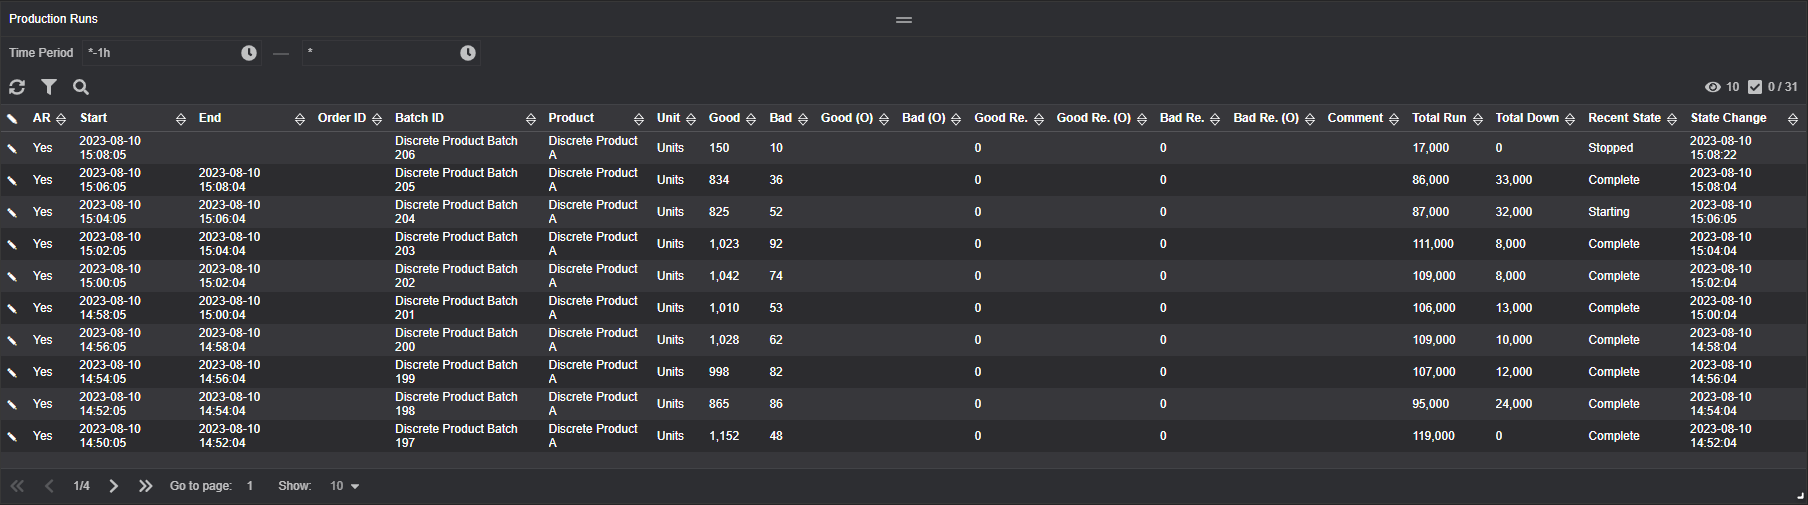
The tpm-oee action, used to retrieve the Production Runs records from OEE monitoring in the back-end, can also be used to change these records in WebStudio. With the introduction of the Secondary Core, user-initiated changes are currently only supported when WebStudio is connected to a Master or Local Core. In fact, user-initiated changes require that WebStudio is connected to the Core where the big table data is stored.
|
Column Selection
By default, all columns are displayed in the Production Runs table. To select which columns are shown, the farg parameter can be added to the dataSource in the widget model. Inside this function argument, the visibleColumns property maps name values from the schema to boolean values. If the name is mapped to the value false, then the column will not be shown in the Production Runs table.
{
    "dataSource": [
        {
            "type": "tpm-oee",
            "subject": "big-table_production-runs",
            "path": "/The OEE Demo Enterprise/The OEE Demo Site/The OEE Demo Area/The OEE Demo Cell/OEE/Production/Production Runs",
            "farg": {
                "visibleColumns": {
                    "StartUTC": true,
                    "EndUTC": true,
                    "OrderID": true,
                    "BatchID": false,
                    "Product": true,
                    "Unit": true,
                    "GoodProduct": true,
                    "BadProduct": true,
                    "GoodProductOverwrite": true,
                    "BadProductOverwrite": true,
                    "GoodRework": false,
                    "GoodReworkOverwrite": true,
                    "BadRework": false,
                    "BadReworkOverwrite": true,
                    "Comment": false,
                    "TotalRunTime": true,
                    "RecentState": true,
                    "StateChange": false
                }
            }
        }
    ]
}
Editing Production Runs
To edit Production Run records, select the pen icon in the desired row to open the 'Production Run: Edit' window.
To edit Production Run records, the user must have WRITE permissions on the Production Runs object in the system. For more information on permissions, see the Permissions section.
|
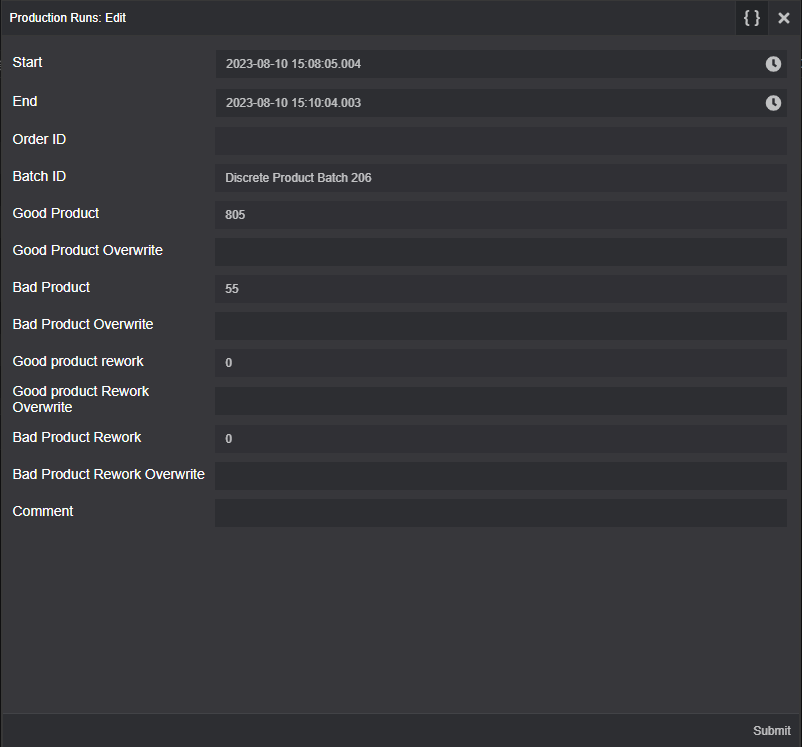
-
If the production run is ongoing, the
Endfield will be empty. -
In this window, the following fields are editable:
-
Good Product Overwrite -
Bad Product Overwrite -
Good Product Rework Overwrite -
Bad Product Rework Overwrite -
Comment
-
| Any overrides provided to the production counts (good, bad or rework) also causes a notification to be sent to the monitor instructing it to recalculate the affected solitaire, overall and aggregated OEE values. Although the calculations are usually quite fast, they will not be immediately reflected in the data. |
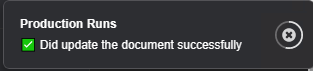
After making the required changes, click Submit. This will update the entry in the table and refresh the table to display the latest records. A notification confirming that the Production Runs table was successfully updated will also be displayed.
Equipment Stops Table
In the Widget Model Editor, select 'Time Period Table' from the side panel to open an example configuration. All of the data required to configure the Equipment Stops table will be retrieved from the system so the 'table' property is not required and can be removed from the model.
-
It is recommended to change the
nameto "Equipment Stops" and provide adescriptionif required in order to provide clarity on the type of information displayed in the table. -
Add a
dataSourceproperty to the model withtype"tpm-oee" andsubject"big-table_stops". Using the configured OEE Demo system, thepathshould be "/The OEE Demo Enterprise/The OEE Demo Site/The OEE Demo Area/The OEE Demo Cell/OEE/Production/Equipment Stops".When configuring the model for your own system, the pathshould point to the Equipment Stops object associated with the TPM OEE Equipment Monitor object, found in the ISA-95 Equipment Model in DataStudio.
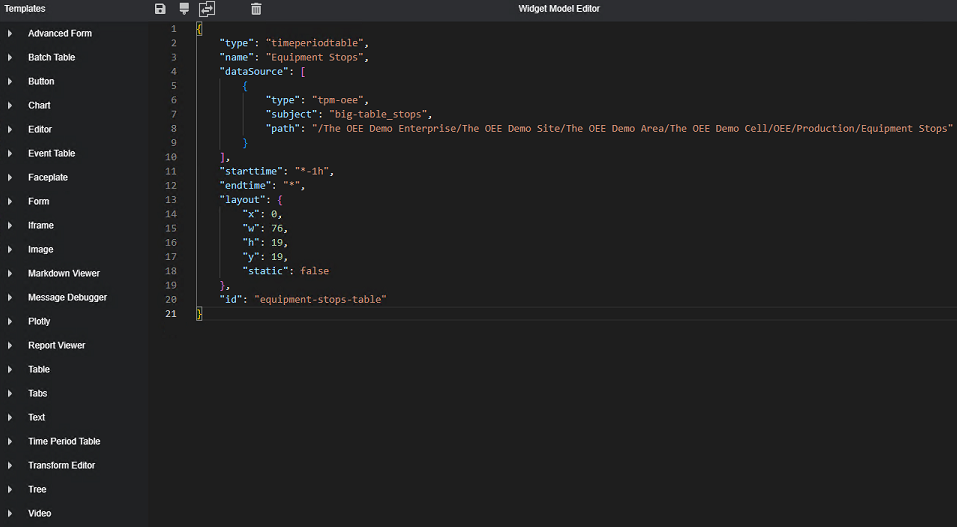
Alternatively, copy the model below into the Widget Model Editor:
{
    "type": "timeperiodtable",
    "name": "Equipment Stops",
    "dataSource": [
        {
            "type": "tpm-oee",
            "subject": "big-table_stops",
            "path": "/The OEE Demo Enterprise/The OEE Demo Site/The OEE Demo Area/The OEE Demo Cell/OEE/Production/Equipment Stops"
        }
    ],
    "starttime": "*-1h",
    "endtime": "*",
    "layout": {
        "x": 0,
        "y": 31,
        "w": 64,
        "h": 32,
        "static": false
    },
    "id": "equipment_stops_table"
}
Click the save icon at the top of the Widget Model Editor to create the Equipment Stops table in the WebStudio compilation.
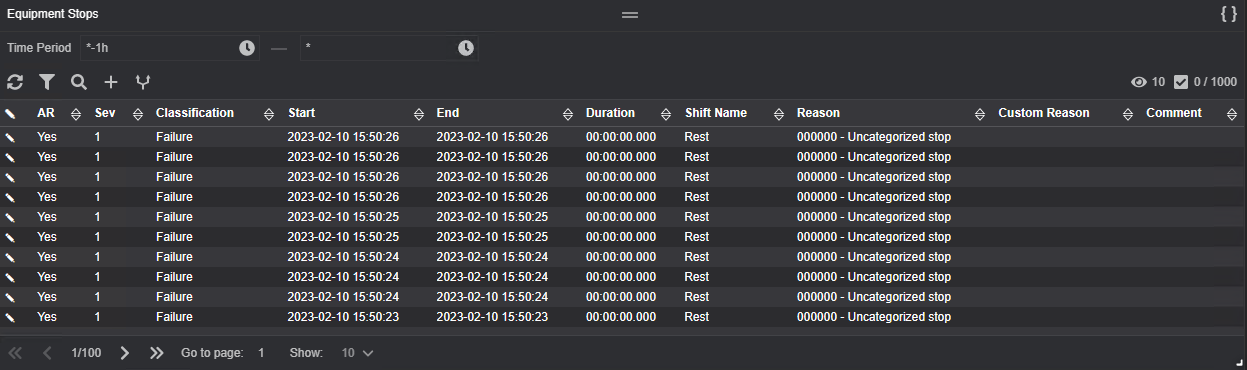
The tpm-oee action, used to retrieve the Equipment Stops records from OEE monitoring in the back-end, can also be used to change existing records and add new records in WebStudio. With the introduction of the Secondary Core, user-initiated changes are currently only supported when WebStudio is connected to a Master or Local Core. In fact, user-initiated changes require that WebStudio is connected to the Core where the big table data is stored.
|
Column Selection
By default, all columns are displayed in the Equipment Stops table. To select which columns are shown, the farg parameter can be added to the dataSource in the widget model. Inside this function argument, the visibleColumns property maps name values from the schema to boolean values. If the name is mapped to the value false, then the column will not be shown in the Equipment Stops table.
{
    "dataSource": [
        {
            "type": "tpm-oee",
            "subject": "big-table_stops",
            "path": "/The OEE Demo Enterprise/The OEE Demo Site/The OEE Demo Area/The OEE Demo Cell/OEE/Production/Equipment Stops",
            "farg": {
                "visibleColumns": {
                    "Autorecord": false,
                    "Severity": true,
                    "StopClassification": true,
                    "StartUTC": true,
                    "EndUTC": true,
                    "Duration": false,
                    "ShiftName": true,
                    "Reason": true,
                    "CustomReason": true,
                    "Comment": false
                }
            }
        }
    ]
}
Editing Equipment Stops
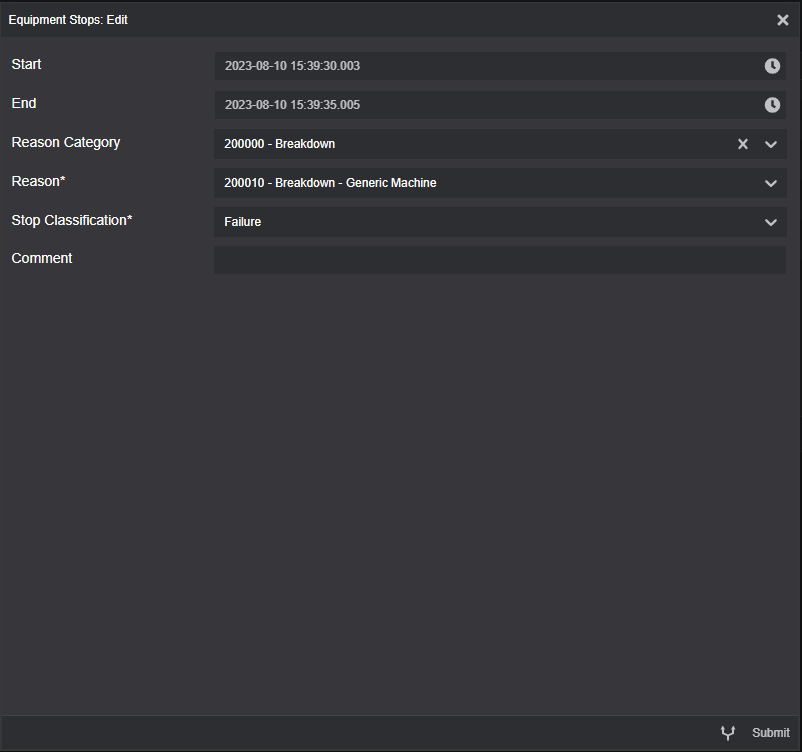
To edit records, select the pen icon in the desired row to open the 'Equipment Stops: Edit' window.
To edit Equipment Stops records, the user must have WRITE permissions on the Equipment Stops object in the system. For more information on permissions, see the Permissions section.
|
-
In this window, the
StartandEndtimes cannot be edited. -
The
Reason Categorydrop-down menu is used to change the category of the Stop Reason. Changing the value in this field will alter the options in theStop Reasonsdrop-down menu.
| Any changes made to equipment stops (splitting, reclassifying or adding manual stops) also causes a notification to be sent to the monitor instructing it to recalculate the affected solitaire, overall and aggregated OEE values. Although the calculations are relatively quick, they will not be reflected in the data immediately. |
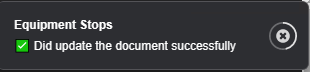
After making the required changes, click Submit. This will update the entry in the table and refresh the table to display the latest records. A notification confirming that the Equipment Stops table was successfully updated will also be displayed.
Adding Equipment Stops
To add Equipment Stops records, the user must have WRITE permissions on the Equipment Stops object in the system. For more information on permissions, see the Permissions section.
|
Additional Equipment Stops can also be added to the Stops table by clicking on the plus icon in the table menu bar. This will open the 'Equipment Stops: Add' window. All fields in this window are configurable.
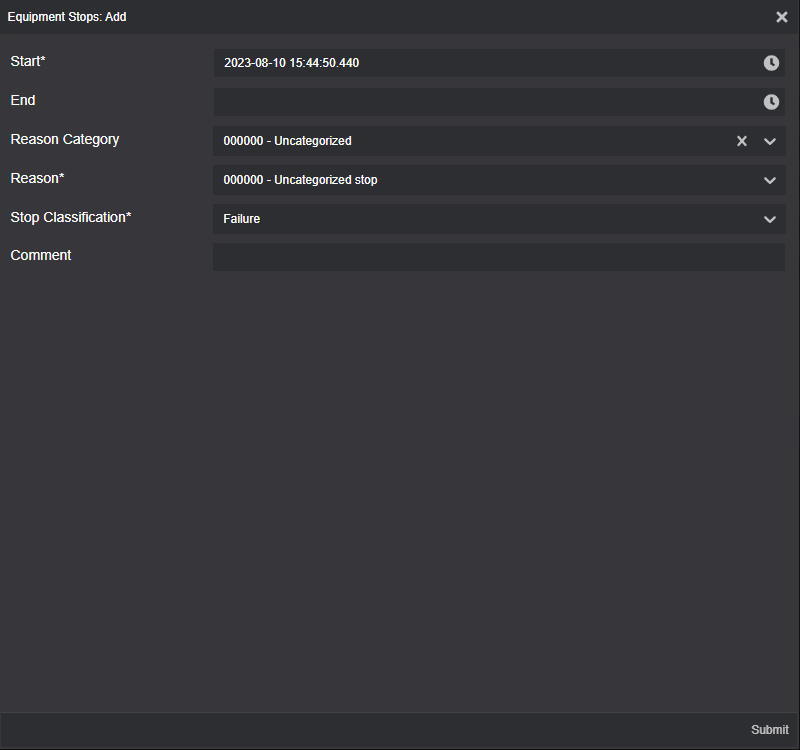
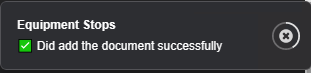
Click Submit to add the Equipment Stop to the Stops Table. A notification confirming that the Equipment Stop was successfully added to the table will also be displayed.
Splitting Equipment Stops
To split Equipment Stops records, the user must have WRITE permissions on the Equipment Stops object in the system. For more information on permissions, see the Permissions section.
|
Using the Equipment Stops table, there are two ways to initiate splits in Equipment Stops.
-
Using the split icon in the table menu bar (this will only split active Equipment Stops)
-
From the Equipment Stops: Edit window.
Splitting Active Equipment Stops
In the Equipment Stops table, click the split icon in the table menu bar to open the Equipment Stops: Split window:

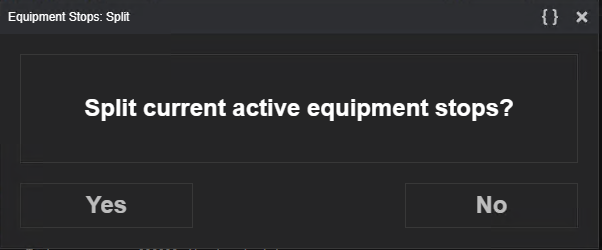
Click Yes to initialise the equipment stop split. If the split was successful, active stops will end and new stops will be created.
| The split will only be successful if there are currently active Equipment Stops. |
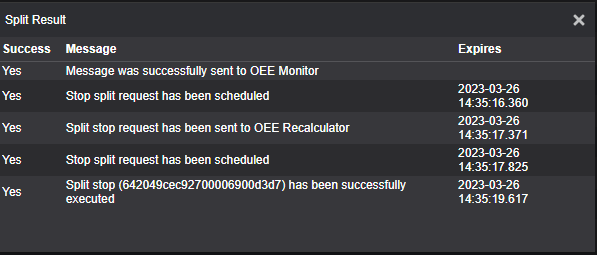
Additionally, the following Split Result will be displayed:
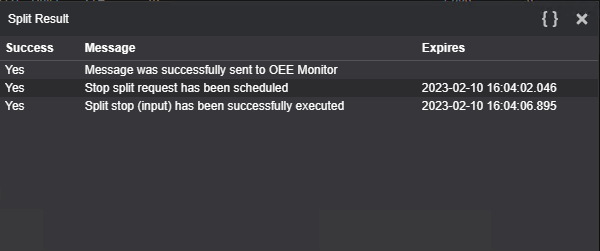
| Both Stop Records resulting from this stop split will inherit the Stop Class from the original stop records. However, the second Stop Record will initially have a "uncategorised" Stop Reason which will need to be updated by the user. The first Stop Record will retain the Stop Reason from the original stop record. |
Manually Splitting Equipment Stops Records
In the Equipment Stops table, click on the pen icon in the row of the stop that should be split. This Equipment Stop can be active or closed. This will open the Equipment Stops: Edit window.
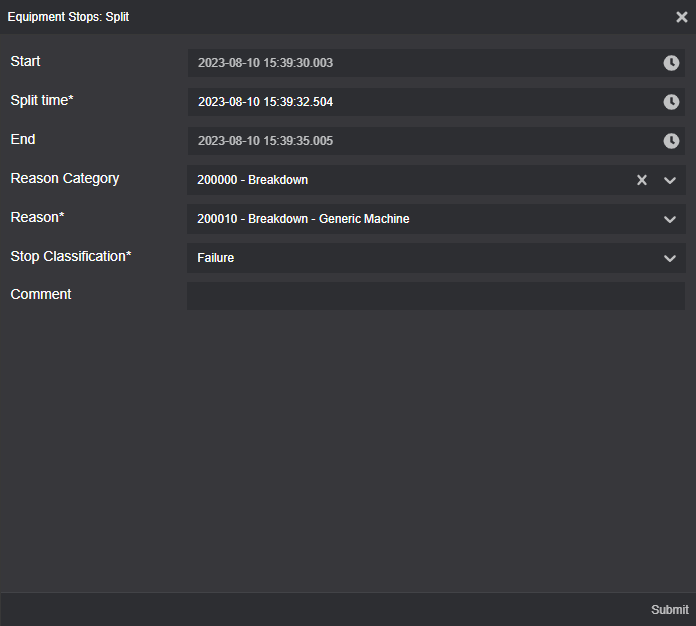
Click the split icon next to the Submit button to open the 'Equipment Stops: Split' window.
-
In this window, the
StartandEndTimes cannot be changed. -
The
Split Timemust be within theStartandEndtime range. If the End Time is not specified, then the Split Time can be set up to the current time. -
The remaining fields on this window can be used to specify details for the second Equipment Stop.
After making the required changes, click Submit.
If the split was successful, a new stop record will be added to the Equipment Stops table. Additionally, the following result will be displayed: